Facebook Login with Xamarin
When creating a new mobile application many things need to be taken into consideration including what technologies to use, main features, target audience, monetization, scalability, the list goes on. However before digging into any of that, every app needs two core features in order to reach a large audience:
- The ability to run on both iOS and Android
- An easy way for users to login and integrate with friends
Luckily, there are two libraries out there that give us those features for free. Xamarin takes care of cross platform capability, with the option to even target Windows phone (although who has one of those?). Facebook on the other hand allows users to log in and connect with friends who have also logged in with Facebook. That’s a lot of functionality for free, however getting the two to cooperate isn’t as straight forward as it would seem, mainly thanks to some broken versioning and disconnect between the C# used to program with Xamarin, and the Java that Facebook expects.
Prereqs
- A PC running Windows: Although not my first choice of OS, all the work will be done in Visual Studio, so Windows is a must.
- A Facebook Developer Account: This is free and easy to set up here.
- An install of Visual Studio 2017: The Community edition can be installed for free here.
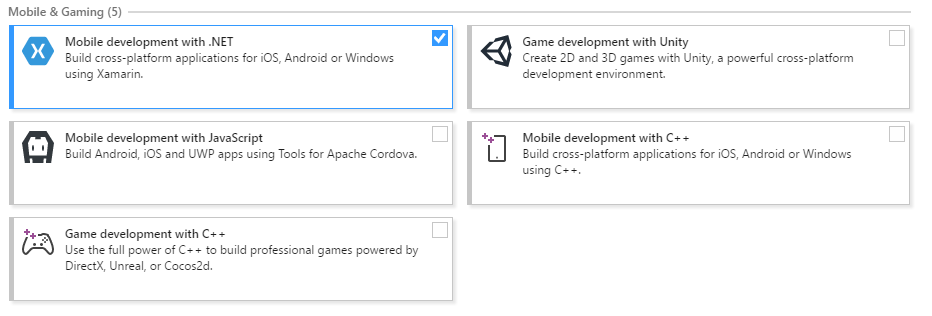
Be sure to select Mobile development with .NET when installing
Creating the project
Fire up Visual Studio and select Create new project…, then select Cross Platform App from the Cross-Platform section
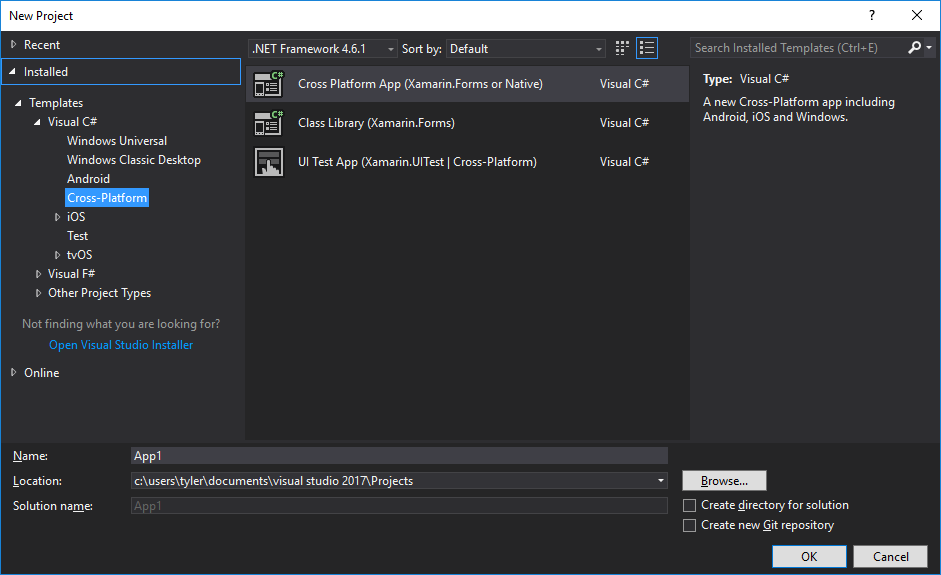
This is what your project selection should look like
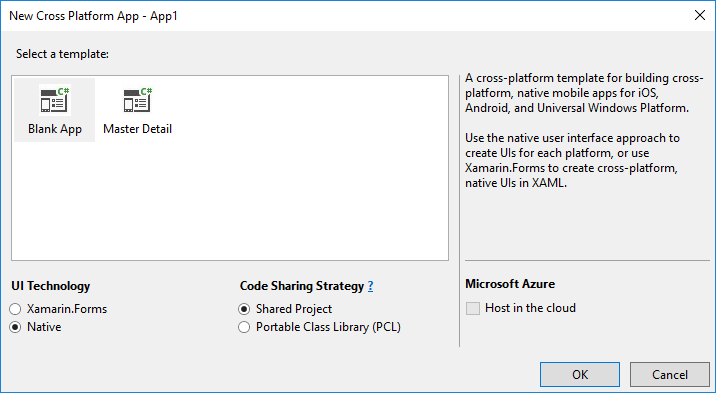
From here you’ll be presented with three more options for your app:
- Blank App vs Master Detail - We’ll keep things simple and stick with Blank App
- Xamarin.Forms vs Native - Xamarin.Forms is a great tool, but we want a native experience
- Shared Project vs Portable Class Library - This is how Xamarin will get your code to run on different platforms
- Shared Projects are basically the inclusion of extra code. When working in the shared project, you’ll essentially be working in an extension of whatever project you currently have selected to build. This allows for very easy sharing of models and other basic classes, and allows the use of
#ifdirectives to control platform specific code. - Portable Class Libraries are a little more robust, but require more boilerplate. Instead of compiling directly into your code, the PCL project is its own entity that different libraries can target. This makes integrating them easy if they’re supported, but many dependency injection interfaces will be needed if they’re not.
- Shared Projects are basically the inclusion of extra code. When working in the shared project, you’ll essentially be working in an extension of whatever project you currently have selected to build. This allows for very easy sharing of models and other basic classes, and allows the use of
For big applications, shared projects require special care or the code can become unmanageable. However they’re quicker to get up and running, so that’s what we’ll go with.
Final project configuration
Installing Packages
Now this is where things got difficult for me personally, and it all stems from bad versioning. The current version of Xamarin.Facebook.Android we want to use is 4.4.0.2, but what appears to be the current version is 4.22.0, which is not compatible with our platform. This all stems from a change in the number of versioning numbers. NuGet doesn’t understand this and assumes 4.22.x > 4.4.x.x, even though that is not the case. Fortunatly this can be solved with one command in the package manager console.
Install-Package Xamarin.Facebook
This package is versioned correctly, and will get the right version of all its dependencies. While NuGet may complain that some packages are outdated, this should be ignored.
Setting up Facebook
Everything we need is finally installed. Last thing to do before getting a login button on screen is configure our Facebook SDK. The Quick Start for Android will walk you though this whole process.
After that, go to your app settings and ensure Single Sign On is turned on.
Adding Code
Now that everything is in place, we can actually add a log in button. Open Resources/layout/Main.axml and set the layout to:
<?xml version="1.0" encoding="utf-8"?>
<LinearLayout xmlns:android="http://schemas.android.com/apk/res/android"
    android:orientation="vertical"
    android:layout_width="fill_parent"
    android:layout_height="fill_parent">
    <com.facebook.login.widget.LoginButton
        android:id="@+id/login_button"
        android:layout_width="wrap_content"
        android:layout_height="wrap_content"
        android:layout_gravity="center_horizontal"
        android:layout_marginTop="30dp"
        android:layout_marginBottom="30dp" />
</LinearLayout>
This puts the Facebook provided LoginButton front and center in our main activity.
Next we need to make sure the button knows what to do once it’s pressed. We do this by adding the following in between the application tags in AndroidManifest.xml:
<activity
    android:name="com.facebook.FacebookActivity"
    android:configChanges="keyboard|keyboardHidden|screenLayout|screenSize|orientation"
    android:theme="@android:style/Theme.Translucent.NoTitleBar"
    android:label="@string/app_name"
    android:exported="true">
    <intent-filter>
        <action android:name="android.intent.VIEW" />
        <category android:name="android.intent.category.DEFAULT" />
        <category android:name="android.intent.category.BROWSABLE" />
        <data android:scheme="@string/fb_login_protocol_scheme" />
    </intent-filter>
</activity>
<meta-data android:name="com.facebook.sdk.ApplicationId" android:value="@string/facebook_app_id" />
This will create an activity with a translucent background that Facebook can populate, essentially making a login popup.
Next, we need to set two configuration strings that Facebook will reference. Add the following to Resources/values/String.xml:
  <string name="facebook_app_id">YOUR_APP_ID</string>
  <string name="fb_login_protocol_scheme">fbAPP_ID</string>
Replacing YOUR_APP_ID with, you guessed it, your app id. fbAPP_ID on the other hand should stay the same.
Finally, we can dig into Activity code and add some function. The final product will look like this:
using Android.App;
using Android.Content;
using Android.Runtime;
using Android.OS;
using Xamarin.Facebook;
using Xamarin.Facebook.Login;
using Android.Util;

namespace App
{
    [Activity (Label = "MainActivity", MainLauncher = true, Icon = "@drawable/icon")]
    public class MainActivity : Activity, IFacebookCallback
    {

        private ICallbackManager callbackManager;

        protected override void OnCreate (Bundle bundle)
        {
            base.OnCreate (bundle);

            // Set up facebook
            FacebookSdk.SdkInitialize(Application.Context);
            callbackManager = CallbackManagerFactory.Create();
            LoginManager.Instance.RegisterCallback(callbackManager, this);

            SetContentView(Resource.Layout.Main);
        }


        protected override void OnActivityResult(int requestCode, [GeneratedEnum] Result resultCode, Intent data)
        {
            base.OnActivityResult(requestCode, resultCode, data);
            callbackManager.OnActivityResult(requestCode, (int)resultCode, data);
        }

        public void OnCancel()
        {
            Log.Info("FB", "Login Cancelled!");
        }

        public void OnError(FacebookException error)
        {
            Log.Info("FB", "Login Error!");
        }

        public void OnSuccess(Java.Lang.Object result)
        {
            var loginResult = result as LoginResult;
            Log.Info("FB", "Login Success!");
        }
    }
}
There are a couple of things to take notice here. First off is the ICallbackManager, which must be a member variable to be initialized in OnCreate. It allows for the result of the Facebook Activity to be processed properly in OnActivityResult.
Secondly, FacebookSdk.SdkInitialize must be called before SetContentView, otherwise the login button will be created without any idea what to do.
Lastly, IFacebookCallback can be implemented in any class. For simplicity the activity implemented it which is okay for this case. Since we know the only request being sent is a login one, in the OnSuccess method we can safely cast the result to the type of LoginResult.
Wrapping Up
That’s all there is to it! This simple app should now have a button that requests Facebook permissions when pressed, then once you accept your app should appear in your app list on Facebook. One minor hitch you may run into is a window complaining that your phone has an invalid key hash. If that’s the case, it will display your hash and you can simply add that to your app profile.
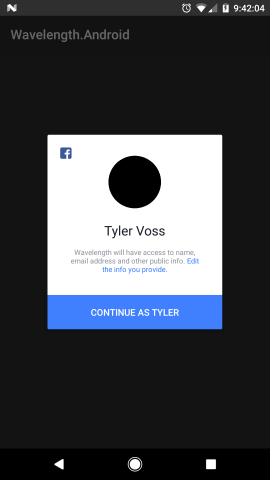
My real profile pic looks a lot better than this I swear...
Now of course iOS is still left to be implemented, but I haven’t quite gotten there yet. Until I do, you can read up on the iOS Docs or dig deeper into the Android Docs to add some real functionality.
Good Luck!